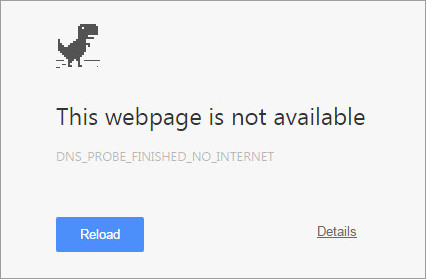
So recently I was getting this ‘DNS Probe Finished No Internet’ error while trying to browse the internet which was very frustrating. There wasn’t much of help online, but after trying several methods to fix the issue, I found out that it was one kind of DNS server error from my end.
For my case it was just a DNS issue and I fixed the Dns_Probe_Finished_No_Internet issue just by changing the automatically obtained DNS servers to Open DNS. But your case may be different and you might have to try some other methods. That’s why I will list all the solutions provided by me and other experts to fix the error in your Windows 7, 8 and 10 computers.
Solution 1: Using Command Prompt
You can use a simple command line to get rid of the error. First, open windows command prompt by typing cmd in windows search box and hitting enter. You can also use these shortcut keys ”Windows Key + R” then type in cmd and hit Enter. This will open up the command prompt and once you have opened it, type in or copy and paste the following code.
netsh winsock reset
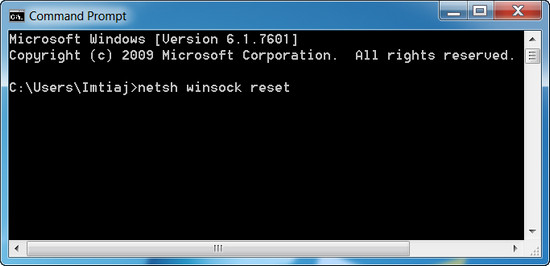
Now press Enter and then restart your computer. Hopefully it will solve the issue.
If the command line above doesn’t solve the problem then your IP address may also cause the connection issue and you can release the IP and renew it which might solve the problem. Open command prompt again and type in ipconfig /release and hit enter. Once done again type in ipconfig /renew and hit enter again.
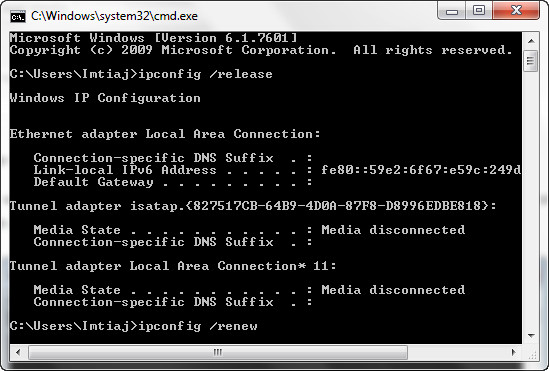
Make sure there is a space between ipconfig and forward slash.
Now we will flush the DNS that could be a solution to your problem. Open up command prompt again and type in ipconfig /flushdns and hit enter.
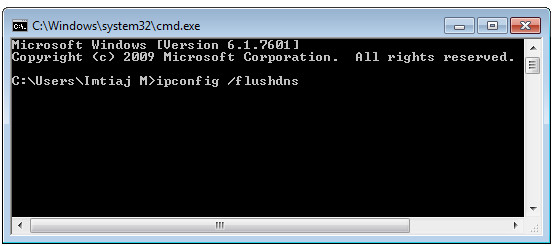
Once you have ran all the commands given above, restart your computer.
Solution 2: Change DNS Address to Open DNS
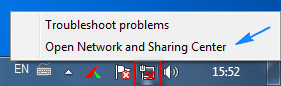
This worked for me pretty well. All I have done is changed my PCs automatically obtained DNS server addresses to Open DNS. Right click on your network icon from windows task bar then click on ‘Network and Sharing Center’.
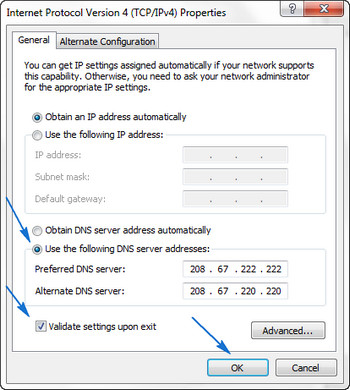
Afterwards, look for ‘Local Area Connection’ and click on it, then from the new window click on ‘Properties’. Then select ‘Internet Protocol Version 4’ and hit ‘Properties’ again. In the new window select the radio button that says ‘Use the following DNS server addresses’ and then in the preferred DNS server box type in 208.67.222.222 and in the alternate DNS server box type in 208.67.220.220 and then check the box that says ‘Validate settings upon exit’ then click OK.
This will change your computers DNS server addresses to Open DNS which is one of the most reliable free DNS server out there. Alternatively you can pick any other preferable free public DNS server from this list. Now try to load the webpages that was showing error and see if it has solved. If this method doesn’t work for you, move to solution 2.
Solution 3: Clear Cache, Reinstall your browser
- Clearing Cache in Chrome – To clear the cache in Google chrome browser, click on the Customize and control button from the top right corner and then click on Settings. Scroll down and click on Show Advanced Settings. Under the privacy section click on Clear Browsing Data. In the new window check the box that says Cookies and Other site and Plugin Data also check Cached Images and Files after that click on Clear browsing data.
- Clearing Cache in Firefox – To clear the cache in Mozilla Firefox, click on History then clear recent history. Afterwards click on details. Check Cookies and Cache from there and click on Clear now.
You can also try re-installing the browser and see if it resolve the problem. Another option would be installing a new browser that you haven’t been using already. Like Safari or Opera.
Also Read
– 5 Other Cameras Like GoPro But Cheaper
– 5 Best Bluetooth Headphones Under $50
Solution 4: Reboot, Power Cycle Your Router
Reboot your router from the router settings. Access your router settings with the URLs given below for various routers. The default username and password is: admin
- TP-link – http://192.168.0.1
- Linksys – http://192.168.1.1
- 3Com – http://192.168.1.1
- D-Link – http://192.168.0.1
- Belkin – http://192.168.2.1
- Netgear – http://192.168.0.1.
- Micromax – http://192.168.10.1
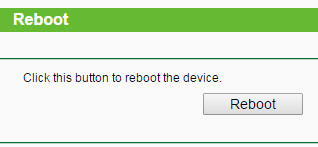
Once you are logged in, navigate to System Tools > Reboot then click the reboot button.
To power cycle your router unplug it from the power source and leave it for at least 5 minutes and then plug it in again. Wait until the router fully starts then try to load the webpage.
Also Check Out – How to Fix ‘DNS Probe Finished NxDomain’ Error
Solution 5: Check Firewall and Internet Security Settings
There are also chances that your firewall or internet security software maybe blocking particular websites for security reasons. Make sure the check the firewall and internet security software settings and find out if they are causing the issue. Also beware that you accidentally don’t visit a malicious website blocked by your firewall.
Solution 6: Try Uninstalling Any Website Filtering Software
If you are using websites filtering software then you should disable it or uninstall it. Once done then try to browse those websites that you were getting error from.
I hope these solutions given above will solve the problem Dns_Probe_Finished_No_Internet regarding DNS probe error. But If it still exist after trying all the solutions given above then please comment below and I will try to help you out by providing some other solutions. Please also comment below if it helped.


Leave a Comment